Introduction
Building a backyard pickleball court within a 30x20 foot area provides a convenient venue for recreation, fitness, and social interaction. This guide explains each phase of the project, from site assessment to final line marking, enabling the reader to create a professional‑looking court without hiring contractors. By following the step‑by‑step instructions, one can control costs, ensure durability, and achieve a surface that meets official dimensions. The information presented is valuable for homeowners, schools, and community groups seeking a practical, low‑maintenance solution.
What You'll Need
- Measuring tape (25 ft minimum) and chalk line for layout
- Compact gravel and sand for sub‑base
- Landscape fabric to prevent weed growth
- Concrete or interlocking paver system for the playing surface
- Edge restraints such as steel or plastic curbs
- Leveling rake and compactor plate
- Paint or tape for court markings – XFasten Yellow Vinyl Floor Tape
Step‑by‑Step Instructions
1. Assess the Site and Obtain Permissions
Begin by confirming that the chosen 30 × 20 ft area is free of underground utilities, large roots, and steep slopes. Contact local authorities to verify that no zoning restrictions or homeowner association rules prohibit a sports surface. Measure the exact dimensions and mark the perimeter with stakes and string to visualize the final footprint. Securing permission early prevents costly rework and ensures compliance with municipal regulations.
2. Prepare the Groundwork
Clear the area of grass, rocks, and debris, then excavate to a depth of approximately six inches to create a stable base. Lay a layer of landscape fabric to inhibit weed growth, followed by three inches of compacted crushed stone for drainage. Use a plate compactor to achieve a firm, level sub‑base; this step is critical for preventing surface cracking under foot traffic.
3. Install Edge Restraints
Edge restraints keep the playing surface contained and provide a clean visual boundary. Position steel or plastic curbs along the perimeter, ensuring they are level and securely anchored with concrete or stakes. The restraints also protect the sub‑base from erosion caused by wind or rain, extending the court’s lifespan.
4. Build the Playing Surface
Choose a surface that balances cost, durability, and maintenance. Concrete offers a long‑lasting, low‑maintenance option, while interlocking pavers allow for easier repairs and aesthetic variety. If using concrete, pour a one‑inch slab, embed a mesh reinforcement, and finish with a broom texture for slip resistance. For pavers, lay a sand bed, position the units tightly, and sweep polymeric sand into the joints before compacting.
5. Level and Smooth the Surface
After the surface material has cured, inspect for high or low spots using a long straightedge. Apply a thin layer of self‑leveling compound where necessary, then sand smooth once dry. A uniformly flat surface ensures consistent ball bounce and reduces the risk of ankle injuries.
6. Apply Court Markings
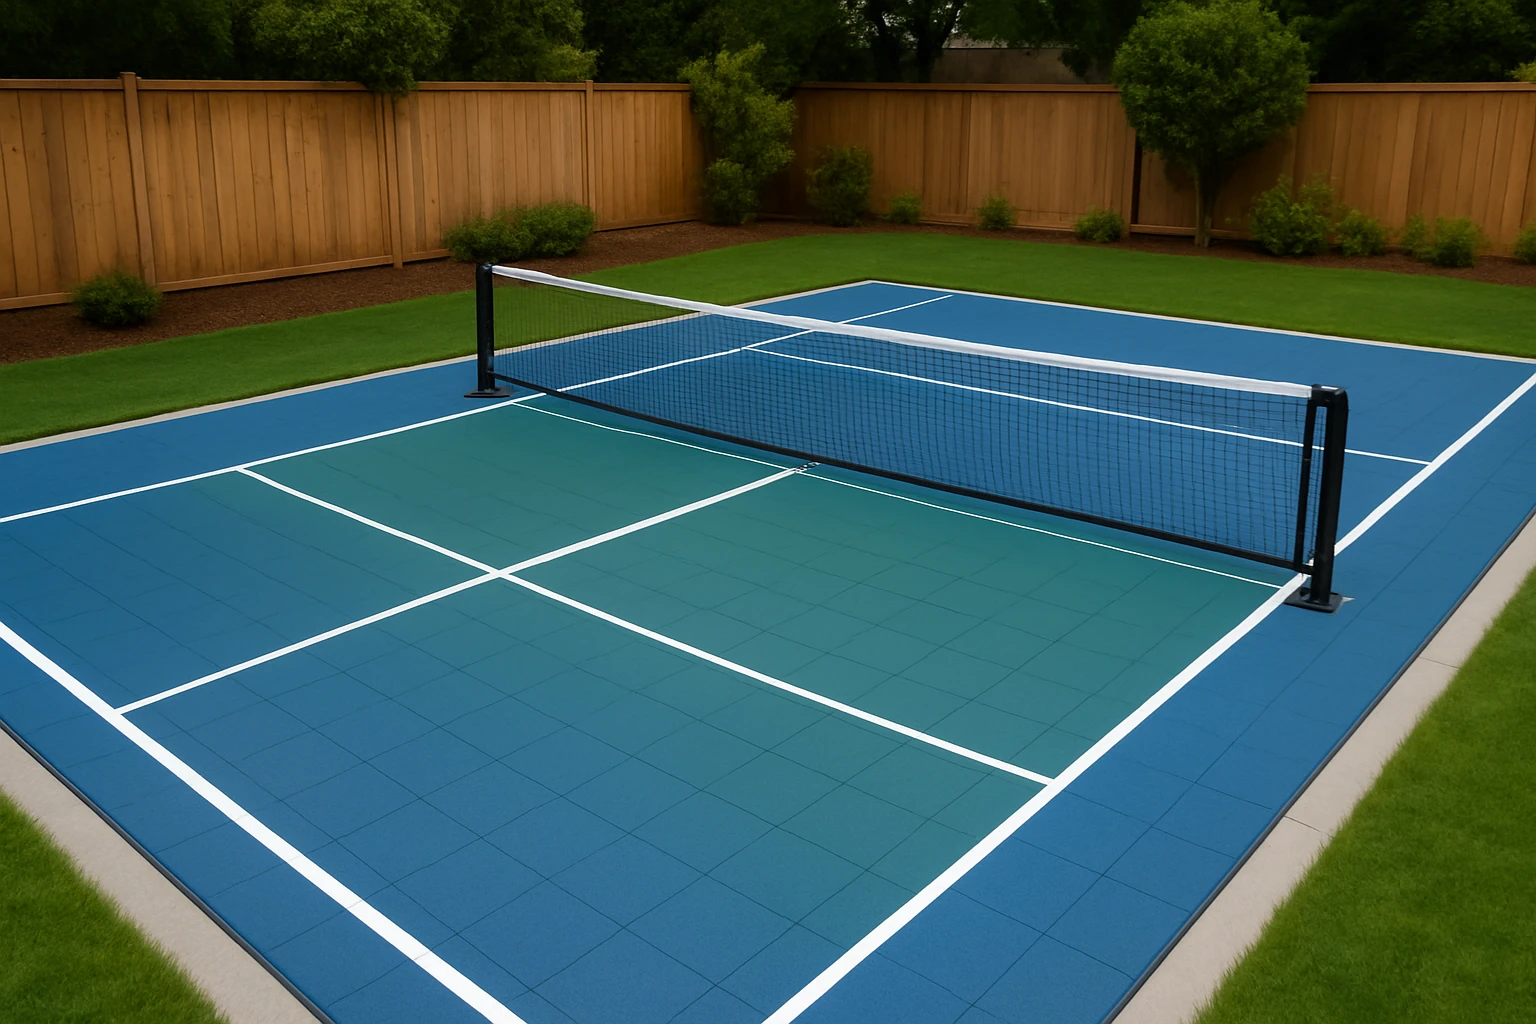
Accurate markings are essential for gameplay and safety. Measure the official pickleball dimensions: a 20 ft × 44 ft playing area centered within the 30 × 20 ft space, with a 7 ft non‑volley zone (kitchen) on each side of the net. Use a chalk line to outline the perimeter, then apply XFasten Yellow Vinyl Floor Tape for the boundary lines. This tape adheres to wood, concrete, and tile, remains visible without being overly bright, and can be removed without residue, making it ideal for temporary or seasonal courts. Press the tape firmly with a roller to ensure full adhesion, especially on uneven surfaces.
7. Install the Net System
Select a portable net kit with adjustable height to accommodate both men’s and women’s play. Anchor the posts in concrete footings or heavy‑duty ground sleeves to prevent movement during vigorous rallies. Verify that the net height is 36 inches at the sidelines and 34 inches at the center, as required by official rules.
8. Add Safety and Comfort Features
Consider installing shade sails or a pergola to protect players from sun exposure during peak hours. Place rubber mulch or rubber tiles around the perimeter to cushion falls and reduce impact on joints. Ensure that the surrounding area is free of obstacles such as low branches or garden tools that could cause accidents.
9. Perform a Final Inspection
Walk the entire court, checking for loose tape, uneven joints, and proper net tension. Test the bounce of a pickleball to confirm that the surface provides a consistent rebound. Make any necessary adjustments before inviting players to use the court.
Tips & Pro Tips
- When laying the sub‑base, add a small amount of polymeric sand to improve compaction and drainage.
- Use a rubber mallet when positioning pavers to avoid cracking.
- Apply the vinyl floor tape in a cool, dry environment; extreme heat can affect adhesive performance.
- Store any excess tape in a sealed bag to protect it from dust and moisture for future repairs.
Troubleshooting
- Tape does not adhere: Clean the surface thoroughly, ensure it is dry, and apply firm pressure with a roller for at least 30 seconds per foot.
- Surface develops cracks: Verify that the sub‑base was compacted to at least 95 % density and that expansion joints were included for concrete.
- Net posts wobble: Reinforce footings with additional concrete or install deeper ground sleeves.
Conclusion
By following the outlined steps, one can transform a modest 30 × 20 ft backyard into a functional pickleball court that meets official specifications. The guide emphasizes careful site preparation, proper material selection, and precise line marking using durable tools such as XFasten Yellow Vinyl Floor Tape. With thoughtful execution, the finished court will provide years of enjoyment, promote physical health, and increase the property’s recreational value.
Products Mentioned in This Guide
Frequently Asked Questions
What are the minimum dimensions for a backyard pickleball court?
A standard pickleball court is 20 ft wide by 44 ft long, but a 30 ft × 20 ft space can accommodate a single court with reduced out‑of‑bounds areas.
Do I need a concrete surface, or can I use interlocking pavers?
Both work; concrete offers a seamless finish, while interlocking pavers are easier to install and can be leveled over a compacted sand base.
How do I prevent weeds from growing through the court surface?
Lay landscape fabric over the prepared sub‑base before adding gravel, sand, and the final playing surface.
What tools are essential for laying the sub‑base and leveling the surface?
A measuring tape, chalk line, leveling rake, compactor plate, and edge restraints such as steel or plastic curbs are key.
What is the best method for marking the court lines?
Use durable paint or yellow vinyl floor tape (e.g., XFasten) applied over a clean, dry surface for clear, long‑lasting markings.