How to Install Motion‑Activated Pickleball Court Lights: A Step‑by‑Step DIY Guide
Introduction
One will discover how to transform a standard pickleball court into a well‑lit, energy‑efficient playing area using motion‑activated lighting. This guide explains every phase, from planning the layout to wiring the fixtures, ensuring a safe and reliable installation. Readers will learn why motion sensors reduce electricity consumption while enhancing visibility during evening matches. By the end, one will be equipped to complete the project with confidence and minimal professional assistance.
What You’ll Need
- Motion‑sensor switch (rated for outdoor use)
- LED flood lights suitable for sports surfaces – see product recommendation below
- Electrical conduit and connectors
- Mounting brackets and hardware
- Wire stripper, screwdriver set, and drill with masonry bits
- Voltage tester and personal protective equipment
Step 1 – Assess Power Availability and Layout
First, locate the nearest outdoor-rated electrical panel that can supply a dedicated 120 V circuit for the lighting system. One should measure the distance from the panel to each intended flood‑light location, noting any obstacles such as trees or fence lines that may affect conduit routing. Sketch a simple diagram indicating the position of each light, the motion sensor, and the conduit path; this visual aid prevents costly re‑work later. When the layout is clear, verify that the circuit breaker can handle the total load of the chosen fixtures.
Step 2 – Choose the Appropriate Flood Light
For a pickleball court, uniform illumination and rapid response are essential; the YANYCN 300W LED Flood Light meets these criteria. This fixture delivers 43,500 lumens at 5000 K daylight white, providing bright, glare‑free light that mimics natural daylight. Its IP66 waterproof rating ensures reliable operation in rain or snow, while the aluminum heat‑sink maintains optimal temperature, extending lifespan beyond 50,000 hours. Priced at $54.97 with a 4.2‑star rating from 40 reviews, it offers a cost‑effective alternative to traditional HPS lamps.
Step 3 – Install the Motion Sensor Switch
Mount the motion‑sensor switch on the exterior wall of the electrical panel, ensuring it is protected from direct sunlight to avoid false triggers. Connect the sensor’s line, load, and neutral wires according to the manufacturer’s wiring diagram, using wire nuts rated for outdoor use. Set the detection range and time‑delay settings to match the court’s dimensions—typically a 30‑foot detection radius and a 5‑minute timer work well for evening play. After wiring, turn the breaker back on and test the sensor with a flashlight to confirm activation.
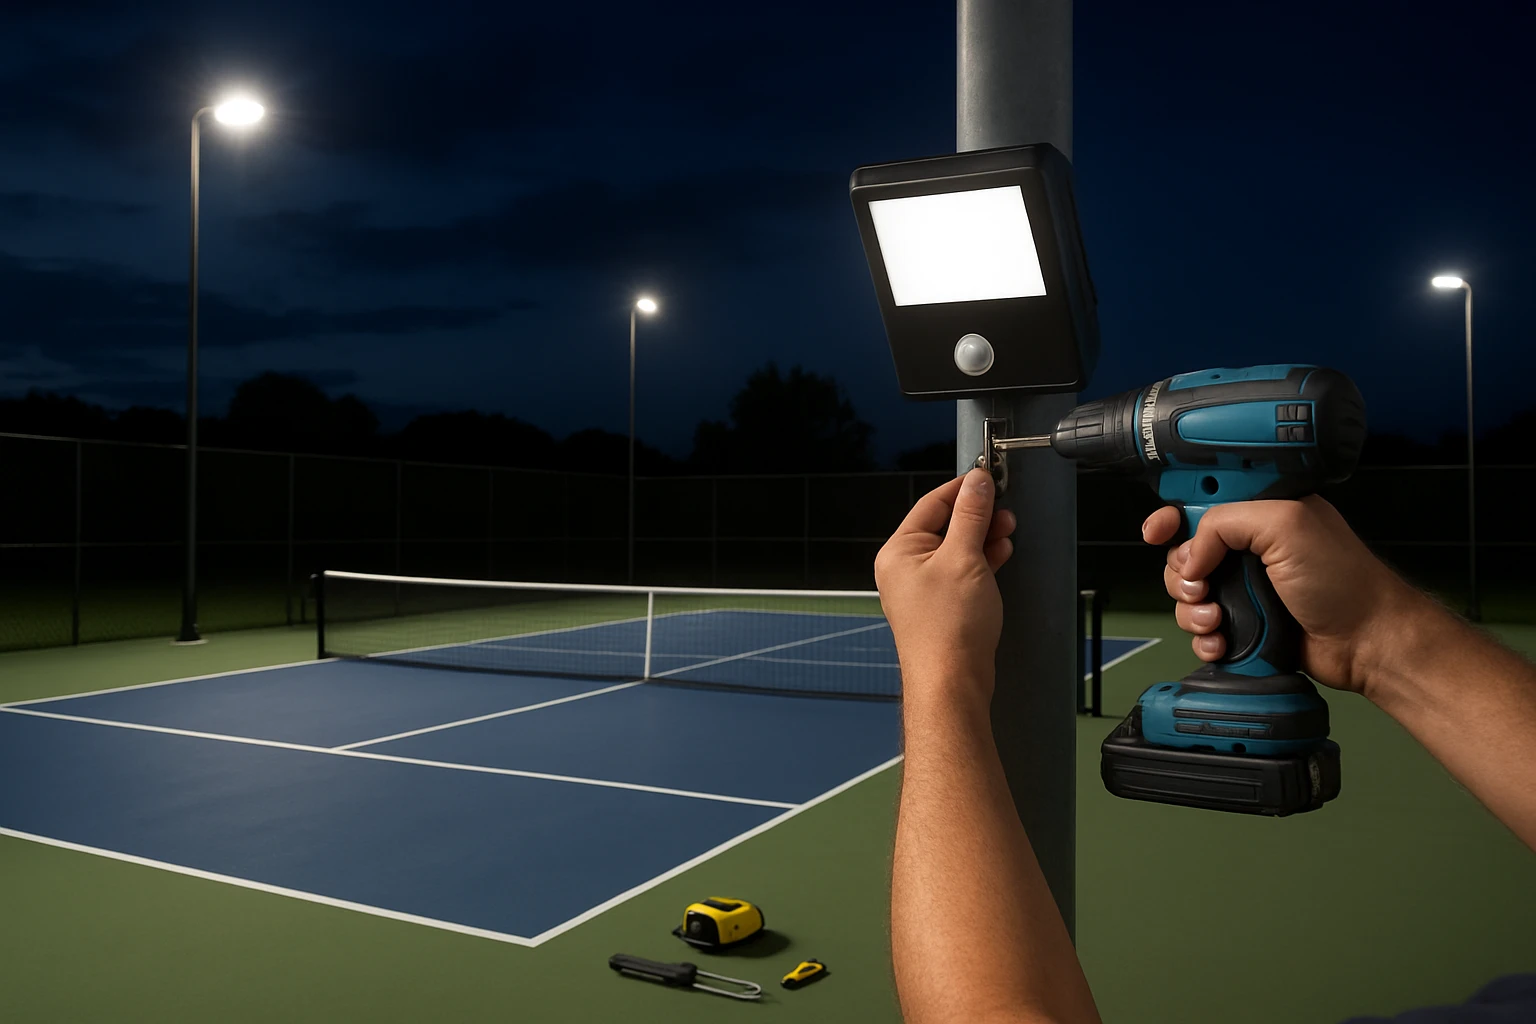
Step 4 – Prepare the Mounting Locations
Using a drill with a masonry bit, create pilot holes at the marked positions for the flood‑light brackets, ensuring they are level and securely anchored to concrete or steel posts. Attach the yoke‑style brackets that accompany the YANYCN 300W LED Flood Light; these brackets allow precise angling to achieve even coverage across the court. Tighten all bolts to the manufacturer’s torque specifications to prevent movement under wind load. Finally, run the conduit from the motion sensor to each bracket, sealing all connections with weather‑proof tape.
Step 5 – Wire the Flood Lights
Pull the appropriate gauge wire through the conduit, ensuring the conductor size meets the 300 W load plus a safety margin (12 AWG is typical). Connect the wire to the flood light’s input terminals, observing correct polarity; most LED fixtures use a simple line‑neutral configuration. Secure the wiring with cable clamps to avoid strain at the junction box. Once all connections are made, double‑check that the conduit is sealed and that no exposed conductors remain.
Step 6 – Mount and Align the Lights
Lift each YANYCN 300W LED Flood Light onto its bracket, tightening the mounting screws until the unit is firmly seated. Adjust the tilt and pan of each fixture so that the light pattern overlaps slightly, eliminating dark spots on the playing surface. Use a handheld lux meter, if available, to verify that the illumination level meets the recommended 300 lux for recreational pickleball. After alignment, secure the final locknuts to prevent accidental adjustment.
Step 7 – Test the Complete System
With the circuit energized, walk through the court to trigger the motion sensor; the lights should illuminate within seconds and remain on for the preset duration. Observe the light distribution for uniformity; any hotspots can be corrected by fine‑tuning the fixture angles. Verify that the sensor does not react to passing wildlife by adjusting the sensitivity knob if necessary. Record the test results and make a note of any adjustments for future reference.
Tips & Pro Tips
- Use a voltage tester on every connection before turning the breaker on to avoid electric shock.
- Apply silicone sealant around conduit entry points to maintain the IP66 rating of the flood lights.
- Consider adding a small solar panel with a battery backup for off‑grid locations; this further reduces operating costs.
- Schedule routine cleaning of the light lenses to prevent dust buildup, which can diminish brightness over time.
Troubleshooting
Problem: Lights flicker after installation.
Solution: Check for loose wire connections and ensure the voltage supplied matches the fixture’s 85‑277 V range. Tighten any loose terminals and verify the breaker is not overloaded.
Problem: Motion sensor does not activate at night.
Solution: Confirm that the sensor’s detection range is not obstructed by foliage and that the ambient light level is below the sensor’s threshold setting.
Conclusion
One has now learned how to plan, wire, and install motion‑activated lighting for a pickleball court using reliable, energy‑efficient components. By selecting the YANYCN 300W LED Flood Light, the project benefits from high lumen output, robust waterproofing, and a long service life at an affordable price. Proper installation ensures safety, reduces electricity costs, and enhances the playing experience for evening matches. With the steps outlined above, anyone with basic DIY skills can complete the project confidently.
Products Mentioned in This Guide
Frequently Asked Questions
What type of motion sensor should I use for outdoor pickleball court lights?
Choose a weather‑rated motion‑sensor switch designed for 120 V outdoor circuits and compatible with LED floodlights.
How many LED flood lights are needed for a standard pickleball court?
Typically 4–6 high‑output LED floodlights spaced evenly provide uniform illumination across the 20 × 44‑foot surface.
Do I need a dedicated circuit for the motion‑activated lighting?
Yes, install a dedicated 120 V circuit with appropriate breaker to ensure reliable power and safety.
Can I install the lights myself without an electrician?
If you are comfortable working with 120 V wiring, using a conduit, and following local codes, a DIY installation is feasible.
How does a motion sensor reduce electricity consumption?
The sensor keeps lights off when the court is empty and only activates them when motion is detected, cutting idle power use.